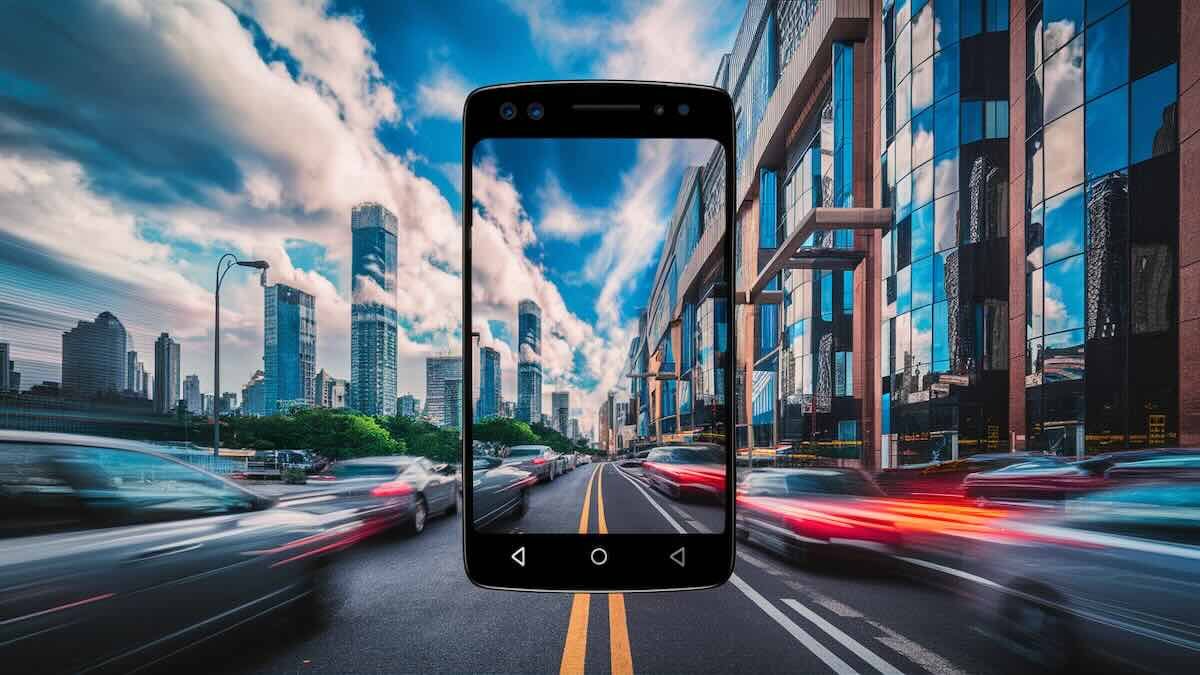
Hyperlapse on Android is a creative video technique that allows users to capture smooth, fast-motion sequences. It’s a type of time-lapse technology that compresses long-duration footage into shorter, dynamic clips.
The primary purpose of hyperlapse is to speed up slow or lengthy events, like a sunset or a city walk, creating engaging and visually captivating videos.
Android users love hyperlapse because it allows them to elevate everyday moments with minimal effort. From travel adventures to bustling city scenes, hyperlapse adds a cinematic touch to their videos, making them perfect for sharing on social media.
What is Hyperlapse?
Hyperlapse is a video technique that involves capturing motion over a long distance, typically while moving the camera, and speeding up the footage. Originating from traditional time-lapse photography, hyperlapse adds an element of motion, allowing for dynamic and fluid sequences.
The key difference between hyperlapse and time-lapse lies in movement. Time-lapse captures stationary scenes over time, like the sky or a growing plant. Hyperlapse, on the other hand, involves the camera moving through space, making it ideal for moving subjects or journeys.
Industries like travel, real estate, and filmmaking widely use hyperlapse to showcase large areas or long events in a visually captivating way. It’s perfect for showing property tours, condensing travel footage, or creating a dramatic effect in movies.
How Hyperlapse Works on Android
Hyperlapse on Android works by using a combination of software and camera technology to capture fast-motion footage while moving. The camera takes a series of still images or video frames at regular intervals, then speeds them up to create a time-compressed video.
Android devices achieve smooth, stabilized footage through advanced algorithms that adjust for shaky movements. Even if the user is walking or driving, the phone’s software corrects any instability, resulting in fluid motion.
Software stabilization plays a crucial role in hyperlapse creation. It uses image recognition to align each frame, ensuring that the final video is steady and professional-looking, even when recorded on the go.
Popular Android Apps for Creating Hyperlapse
Several Android apps make creating hyperlapse videos easy and fun. Here are some of the most popular options for users:
- Microsoft Hyperlapse Mobile is a standout app that allows you to shoot smooth, stabilized hyperlapse videos. Its key features include easy-to-use controls, the ability to choose video speed, and high-quality output. The app is popular for both beginners and advanced users because it provides a straightforward interface and delivers professional results.
- Instagram Hyperlapse (if available) offers a simple, no-fuss way to create hyperlapse videos directly from the app. It automatically stabilizes footage, making it perfect for casual users looking to share creative, fast-motion clips on social media.
For those with supported Android devices, the native camera app often includes a built-in hyperlapse mode. This feature offers convenience since you don’t need to download additional apps. Just open the camera, select the hyperlapse option, and start shooting.
When choosing the best app, consider your needs and device capabilities. For professional-grade videos, Microsoft Hyperlapse is ideal. If you’re looking for quick social media clips, Instagram Hyperlapse is perfect. The native camera app works great for general use without the hassle of downloading extras.
How to Create a Hyperlapse Video on Android
Creating a hyperlapse video on Android is simple with the right steps. Here’s a quick guide:
- Set Up the App
- Open your camera app if it supports hyperlapse, or download a third-party app like Microsoft Hyperlapse.
- Navigate to the hyperlapse mode in the app’s settings.
- Start Recording
- Choose the speed for your hyperlapse (usually between 4x to 32x).
- Press record and start moving steadily in your desired direction.
- Steady Your Phone
- For smoother footage, use a tripod, gimbal, or stabilize the phone with both hands.
- If walking, move at a consistent pace to avoid jerky movements.
- Recommended Duration
- For most scenes, shoot for at least 2-5 minutes to get enough footage for a short, engaging hyperlapse. However, longer recordings may be necessary for time-consuming events.
- Editing and Enhancing
- Once recorded, use editing apps like InShot or Kinemaster to fine-tune your video.
- Add filters, music, or adjust speed for a more polished result.
With these steps, you can easily capture and enhance hyperlapse videos on Android for professional results!
Also read: How to Turn On Qi Charging on Android
Creative Uses of Hyperlapse
Hyperlapse is perfect for adding creativity to your videos, especially in these popular areas:
1. Travel Vlogs
Hyperlapse is ideal for compressing long journeys into short, captivating clips. Whether it’s a road trip, a scenic hike, or a city tour, you can show the highlights of your trip in just a few seconds, making your travel vlogs more engaging.
2. Urban Exploration
For urban exploration, hyperlapse shines by capturing the fast-paced energy of cityscapes. You can showcase bustling streets, moving crowds, or the transition from day to night, offering viewers a dynamic perspective of city life.
3. Nature Videos
Hyperlapse brings out the beauty of slow-moving natural events. You can capture the changing colors of a sunset, drifting clouds, or the movement of stars. These stunning time-lapses provide a sense of wonder and show nature’s beauty in a different way.
4. Real Estate
In real estate, hyperlapse is a great tool for property walkthroughs. Instead of a slow, detailed video, you can create a quick, comprehensive tour of homes or locations, making it easier for potential buyers to view large spaces in a short time.
Tips for Shooting Hyperlapse Videos
Here are quick tips for shooting hyperlapse videos:
- Use a tripod or gimbal for stability.
- Move at a consistent pace when capturing footage.
- Plan your route to avoid sudden turns or obstacles.
- Shoot during daylight for optimal lighting.
- Keep your phone steady with both hands if handheld.
- Choose a simple subject to avoid too much visual clutter.
- Experiment with speed settings to find the best effect.
- Avoid crowded areas to maintain smooth motion.
- Record longer for more flexible editing options later.
These tips will help you create smoother, more engaging hyperlapse videos.
Also read: How to Check WiFi GHz on Android
Advantages of Using Hyperlapse on Android
Here are the key advantages of using hyperlapse on Android:
- Time-efficient storytelling by compressing long footage.
- Easy to capture dynamic scenes with minimal effort.
- Built-in stabilization ensures smooth videos.
- Adds creative flair to travel, nature, and cityscapes.
- Perfect for social media with quick, engaging content.
- No need for professional equipment, just your phone.
- Ideal for property tours and location showcases.
- User-friendly apps make it accessible to everyone.
Hyperlapse on Android offers a simple way to create professional-looking videos quickly.
Limitations of Hyperlapse on Android
Here are the limitations of using hyperlapse on Android:
- Limited support on some devices without built-in hyperlapse modes.
- Potential for shaky footage if stabilization isn’t strong.
- Battery consumption increases with longer recordings.
- Large storage requirements for lengthy video captures.
- Quality may vary depending on the camera and device model.
- Editing options may be limited in native camera apps.
- Challenging in low light due to camera performance.
Despite these limitations, hyperlapse remains a creative and powerful tool on Android.
Conclusion
Hyperlapse on Android offers a fun and efficient way to create dynamic, fast-paced videos. With its ability to compress time, capture smooth motion, and add creative flair, it’s perfect for travel vlogs, nature videos, and even real estate walkthroughs. Plus, Android’s accessible apps and built-in stabilization make it easy for anyone to get started.
To begin, choose a steady shooting method, plan your route, and experiment with different speeds. Keep your phone steady for the best results.
Don’t hesitate to experiment with hyperlapse for your creative projects. Whether you’re showcasing a journey or adding energy to your videos, hyperlapse opens up endless possibilities for engaging content.
FAQs
1. What is the difference between hyperlapse and time-lapse?
Hyperlapse involves moving the camera during recording, while time-lapse is stationary and captures a scene over time. Hyperlapse adds motion for a more dynamic effect.
2. Can all Android phones create hyperlapse videos?
Not all Android phones have built-in hyperlapse modes, but many third-party apps like Microsoft Hyperlapse allow most Android devices to create hyperlapse videos.
3. How long should I record for a good hyperlapse?
It’s recommended to record for at least 2-5 minutes to have enough footage for an engaging hyperlapse video, though longer clips may be required for larger events.
4. How can I stabilize my hyperlapse video on Android?
Use a tripod or gimbal for physical stabilization, and ensure your app or phone has software stabilization to smooth out any movement during recording.
5. What are the best apps for creating hyperlapse on Android?
Popular apps include Microsoft Hyperlapse Mobile and Instagram Hyperlapse, or you can use the native camera app on supported devices.
6. Can I edit hyperlapse videos on my Android phone?
Yes, you can use editing apps like InShot or Kinemaster to enhance your hyperlapse videos, adjust speed, add filters, or include music.